(3.3) Implementing React_ Redux & HTTP. 영어쌤이 만드는 회원가입, 인증[CRUD] 만들어욤! 리액트와 파이썬 장고

Implement Redux
- 저번 포스팅까진 React-Redux를 이용해 서로 연결하고 Redux Tool을 이용해 leads의 정보들을 띄워 보았습니다.
- 이번 시간엔 이 정보들을 브라우저상의 User Interface에 띄울 수 있도록 할 것 입니다.
(17) Leads.js에 UI에 반영하는하는 코드 작성하기
- Leads.js 코드 내에 render 에 반영이 되어 볼 수 있게 해야 합니다.
- Leads.js에 해당 기능을 반영하는 코드를 작성합니다.
import React, { Component, Fragment } from "react";
import { connect } from "react-redux";
import PropTypes from "prop-types";
import { getLeads } from "../../actions/leads";

export class Leads extends Component {
	static propTypes = {
    	leads: PropTypes.array.isRequired
    };

    componentDidMount() {
    	this.props.getLeads();
    }

    // return 내의 div내의 코드 대신 Fragment 로 바꿔줍니다.
    render() {
    	return (
        <!--
        	<div>
            	<h1>Leads List</h1>
            </div>
            -->
            <Fragment>
            	<h2>Leads</h2>
                <table className="table table-striped">
                	<thead>
                    	<tr>
                        	<th>ID</th>
                            <th>Name</th>
                            <th>Email</th>
                            <th>Message</th>
                            <!-- delete button을 위한 자리 -->
                            <th />
                        </tr>
                    </thead>
                    <tbody>
                    	{ this.props.leads.map(lead => (
                        	<tr key={lead.id}>
                            	<td>{lead.id}</td>
                                <td>{lead.name}</td>
                                <td>{lead.email}</td>
                                <td>{lead.message}</td>
                                <td>
                                <button className="btn btn-danger btn-sm">
                                 Delete </button>
                                </td>
                            </tr>
                        )) }
                    </tbody>
                </table>
            </Fragment>
        );
    }
}

const mapStateToProps = state => ({
	leads: state.leads.leads
});

export default connet(mapStateToProps, { getLeads })(Leads);
- 이렇게 위와 같이 UI에 반영을 위한 작성하면 다음의 결과를 얻을 수 있습니다.
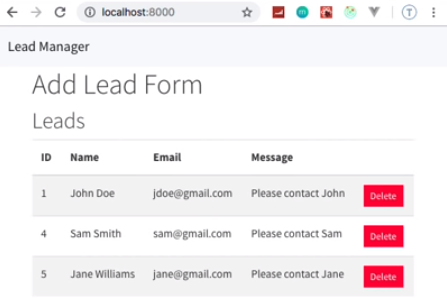
결과화면
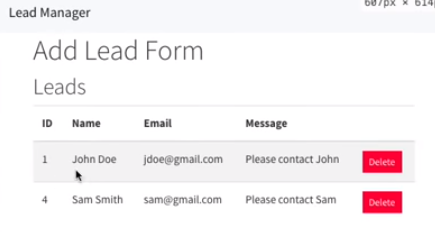
- Yeah, we're now pulling those leads from the server!!!!
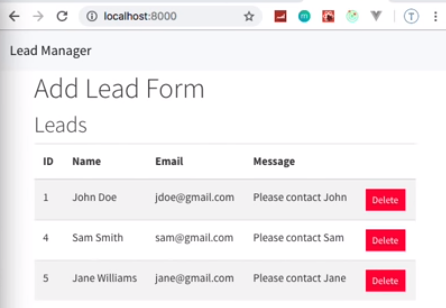
(18) 포스트맨으로 테스트 작업 하고 브라우저에서 결과 확인 테스트하기
- 다음과 같이 포스트맨을 통해 새로운 데이터를 생성합니다.

- Send 버튼을 눌러 data Pushing request를 하면 UI 에서 Pulling을 할 것 입니다.(너무 당연하잖아!!)
결과화면
(19) /leadmanager/frontend/src/actions/leads.js 수정 . Delete function(기능) 추가해 주기
- actions 폴더 내의 leads.js 코드에 delete기능을 위한 코드를 추가해 줍니다.
// lead.js axios 활용예정
import axios from 'axios';

import { GET_LEADS, DELETE_LEAD } from './types';

// GET LEADS
export const getLeads = () => dispatch => {
	axios.get("/api/leads/")
    	.then(res => {
        	dispatch({
            	type: GET_LEADS,
                payload: res.data
            });
        })
        .catch(err => console.log(err));
};

// DELETE LEAD
export const deleteLeads = (id) => dispatch => {
	axios.get(`/api/leads/${id}/`)
    	.then(res => {
        	dispatch({
            	type: DELETE_LEADS,
                payload: id
            });
        })
        .catch(err => console.log(err));
};
- 주의할 점!!!
-- 여기서 평소 우리가 사용하던 Quotation Mark(따옴표)인 ( " ) 나 Single quotation mark(작은 따옴표)인 ( ' )를 쓰는 것이 아닙니다.
-- 위의 코드에도 반영된 것인데요

-- 코드 내에서 볼 수 있는 (Backticks)( ` )라고 합니다. 한글로는 잘 모르겠네요... 아시는 분은 설명을 부탁드립니다... 저는 사전도 찾아봤는데 잘 모르겠더군요..
-- 제 포스팅 중 Node 서버 포트 지정 반자동화 기능 구현에도 같은 이유로 쓰인 부분이 있습니다.
--- 링크 참고: Node.js 로 server.js 파일 실행 시 포트 지정 반자동화
-- 우리가 변수같은 것을 통하여 호출 및 이용을 할 때 이 Backticks( ` )가 쓰입니다.
(20) /src/actions/types.js
// /src/actions/types.js
export const GET_LEADS = "GET_LEADS";
export const DELETE_LEAD = "DELETE_LEAD";
- (3.1)의 (10) 에서도 작성했던 types.js에 delete 기능을 사용하기 위해 위의 코드 중 추가된 것을 작성해 주세요.
(21) /reducers/leads.js 파일 작성 재진행
- leads.js에 새로운 기능인 delete를 추가해 줍니다.
// leads.js
import { GET_LEADS, DELETE_LEAD } from '../actions/types.js';
const initialState = {
leads: []
};
export default function(state = initialState, action) {
switch(action.type) {
case GET_LEADS:
return {
...state,
leads: action.payload
};
case DELETE_LEAD:
return{
...state,
leads: state.leads.filter(lead => lead.id !==
action.payload)
};
default:
return state;
}
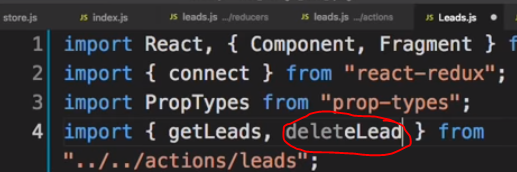
}(22) /src/components/leads/Leads.js 코드에 delete관련 코드 추가
import React, { Component, Fragment } from "react";
import { connect } from "react-redux";
import PropTypes from "prop-types";
import { getLeads, deleteLead } from "../../actions/leads";
export class Leads extends Component {
static propTypes = {
leads: PropTypes.array.isRequired,
getLeads: PropTypes.func.isRequired,
deleteLeads: PropTypes.func.isRequired
/* 영상에선 위의 getLeads, deleteLeads가 누락되어 있어서
add form을 만들다가 수정하더군요. 입력해 주셔야 합니다. 꼭꼭!!!*/
};
componentDidMount() {
this.props.getLeads();
}
// return 내의 div내의 코드 대신 Fragment 로 바꿔줍니다.
render() {
return (
<!--
<div>
<h1>Leads List</h1>
</div>
-->
<Fragment>
<h2>Leads</h2>
<table className="table table-striped">
<thead>
<tr>
<th>ID</th>
<th>Name</th>
<th>Email</th>
<th>Message</th>
<!-- delete button을 위한 자리 -->
<th />
</tr>
</thead>
<tbody>
{ this.props.leads.map(lead => (
<tr key={lead.id}>
<td>{lead.id}</td>
<td>{lead.name}</td>
<td>{lead.email}</td>
<td>{lead.message}</td>
<td>
<button onClick={this.props.deleteLead.bind
(this, lead.id)}
className="btn btn-danger btn-sm">
Delete </button>
</td>
</tr>
)) }
</tbody>
</table>
</Fragment>
);
}
}
const mapStateToProps = state => ({
leads: state.leads.leads
});
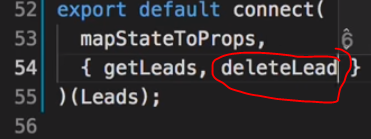
export default connet(
mapStateToProps,
{ getLeads, deleteLead }
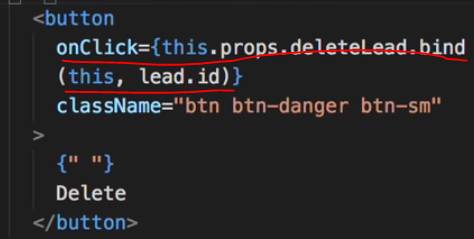
)(Leads);- 컴포넌트에 deleteLead 를 추가합니다.
- Delete버튼을 클릭시 삭제 동작을 작용시키게 하고 결과가 반영되도록 합니다.
결과
- 이제 삭제 기능에 대한 작성이 모두 완료되었으니 확인해 봅니다.
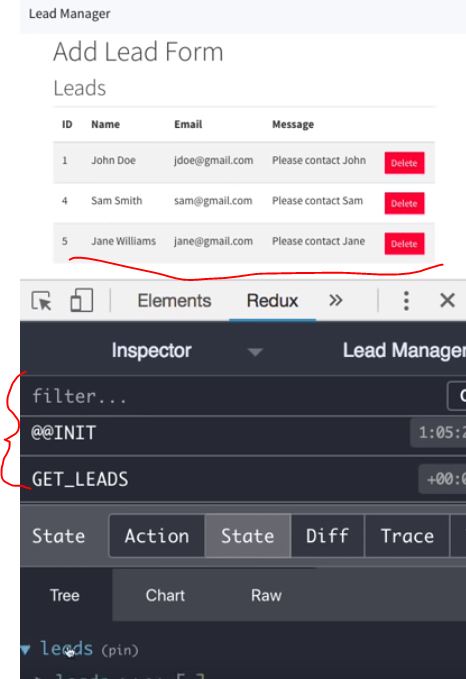
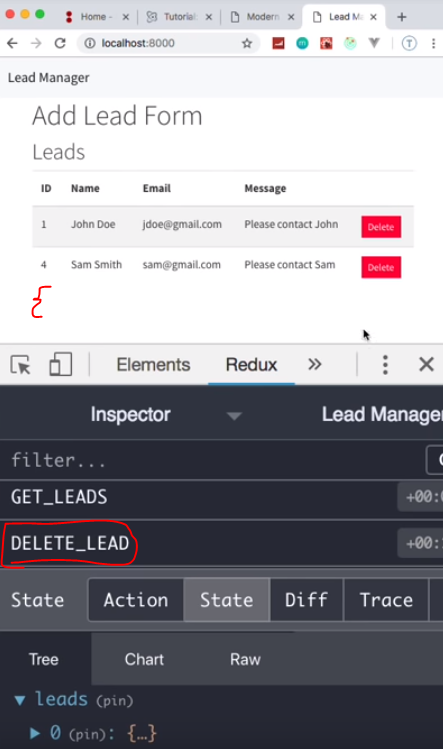
- 다음과 같이 Redux tool 에서도 확인이 가능합니다.
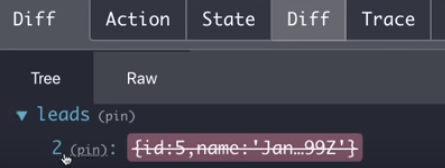
- 여기서 잠시!!!! 오류가 발생했네요!
- 브라우저 새로고침을 했을 시에 삭제했던 내용이 다시 나타났습니다.
- 흠... 무슨 일일까요?
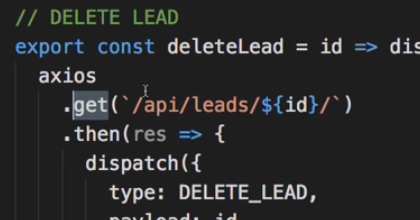
- 앗!!!! axios 기능을 활용했던 /src/actions/leads.js 에서 한 가지 실수가 있었군요!!
- 아래의 이미지와 같이 되어 있던 delete 관련 코드의 axios.get 을 axios.delete 로 수정합니다.
// lead.js axios 활용예정
import axios from 'axios';

import { GET_LEADS, DELETE_LEAD } from './types';

// GET LEADS
export const getLeads = () => dispatch => {
	axios.get("/api/leads/")
    	.then(res => {
        	dispatch({
            	type: GET_LEADS,
                payload: res.data
            });
        })
        .catch(err => console.log(err));
};

// DELETE LEAD
export const deleteLeads = (id) => dispatch => {
	axios.delete(`/api/leads/${id}/`)
    	.then(res => {
        	dispatch({
            	type: DELETE_LEADS,
                payload: id
            });
        })
        .catch(err => console.log(err));
};
이렇게 해서 삭제 기능을 부여해 줬습니다.
- 조금 더 하면 좋겠지만 또다시 스압이 왔군요!
- 7까지 전체 포스팅이 끝나고 나면 정리를 할 것 입니다.
- btw(By the way)~! 다음 포스팅은 계정 정보 입력 및 생성에 대한 from을 만들고 작동하도록 할 것 입니다.
(3.4) 에서 뵐게요!
Stay tuned for the next episode of Web development by the English teacher JOHNNYCLUB!!!


